| The Warp | Line linen yarn 8/1, half bleached, Nel 8, tex 206, 1 kg = approx. 5 120 m |
| Warp | width 46,4 cm number of warp ends 232 length 3,8 m |
| Density | 5 threads/cm |
| Reed | 50/1 |
| Weave | Plain weave, fringes |
| The Weft | Linen, silkwool and wool yarns |

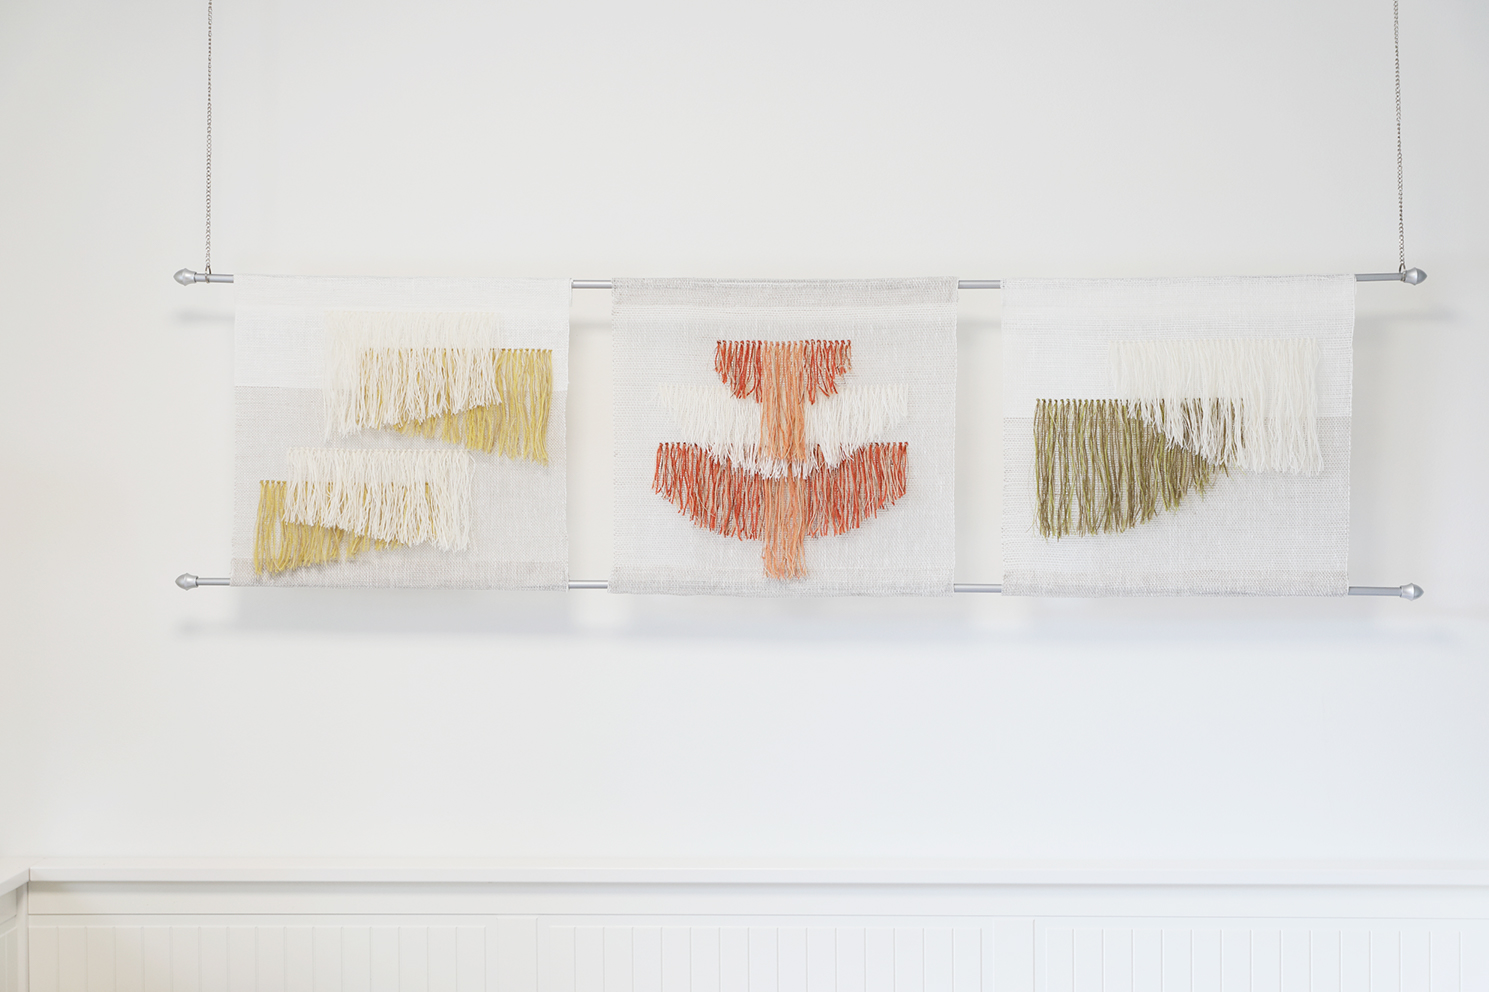
Beams of light, arcs and birds
One shaped form needs only one row of knots. Fringes are cut into a wanted shape while finishing the weave.
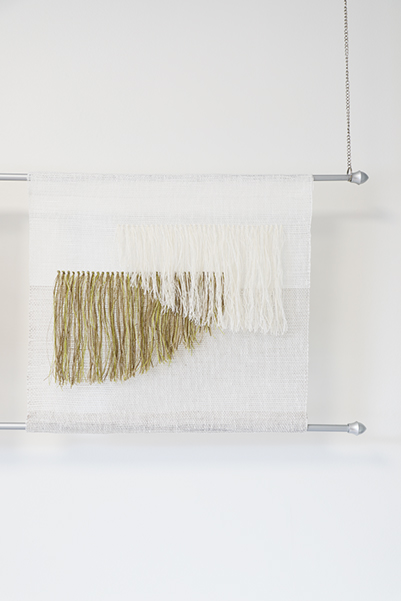
Light and see-through fringes form new shapes when overlapping. Use the same shapes in one cloth to achieve a clear and calm end result.
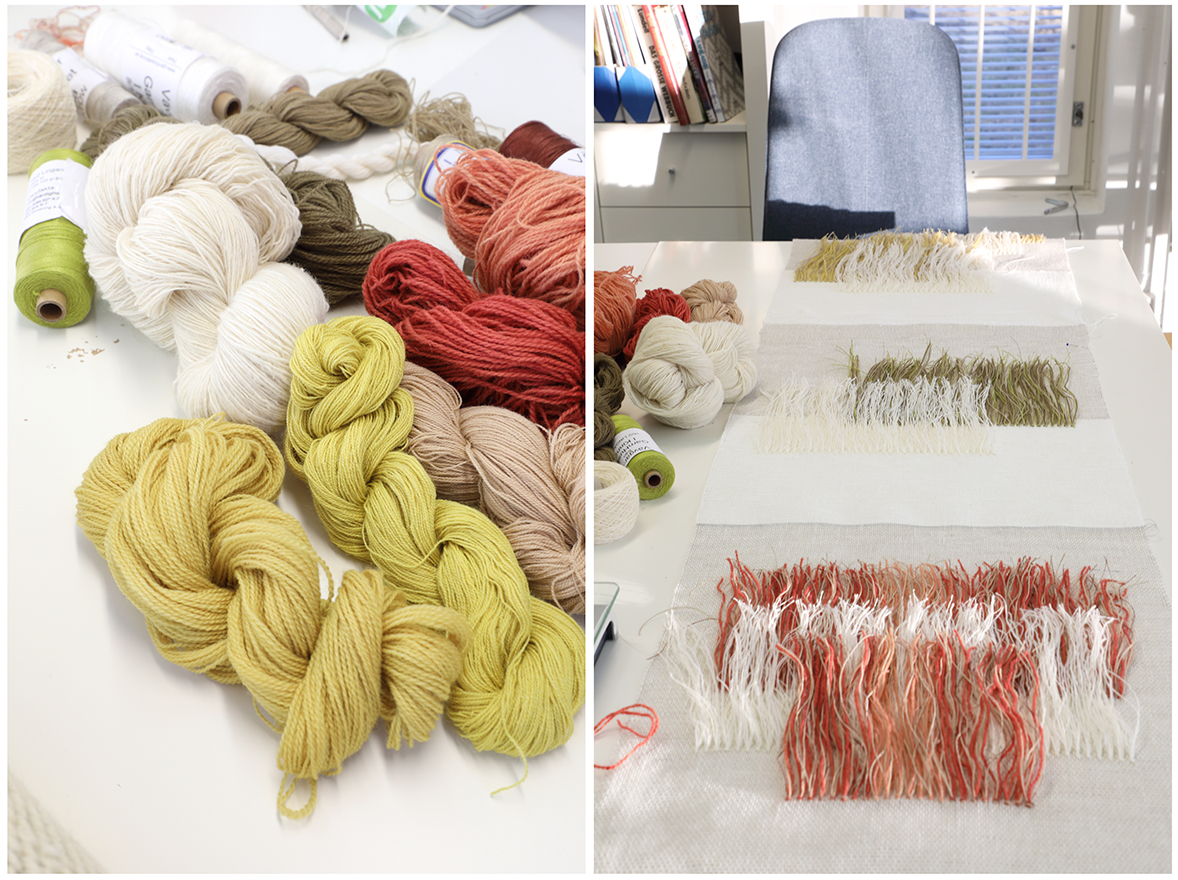
Fringes are knotted with thin wool and linen threads. Wool yarns are hand dyed. Weaving is fun and the result is unique when you use your favourite colors and materials!
Weaving instructions
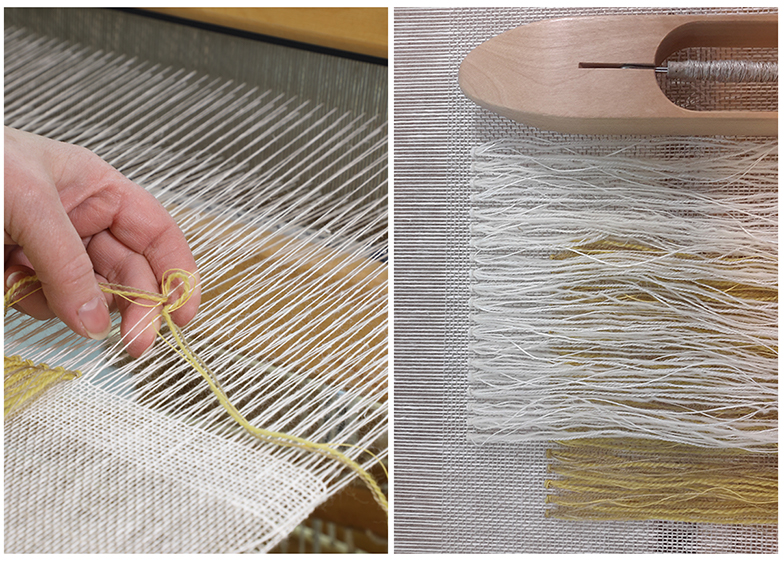
Gather thin wool and linen yarns for the fringes. Choose yarns with beautiful surface and structure. There are two thin linen yarn and two wool or silkwool yarn in one fringe. Choose yarn colors that blend well together.
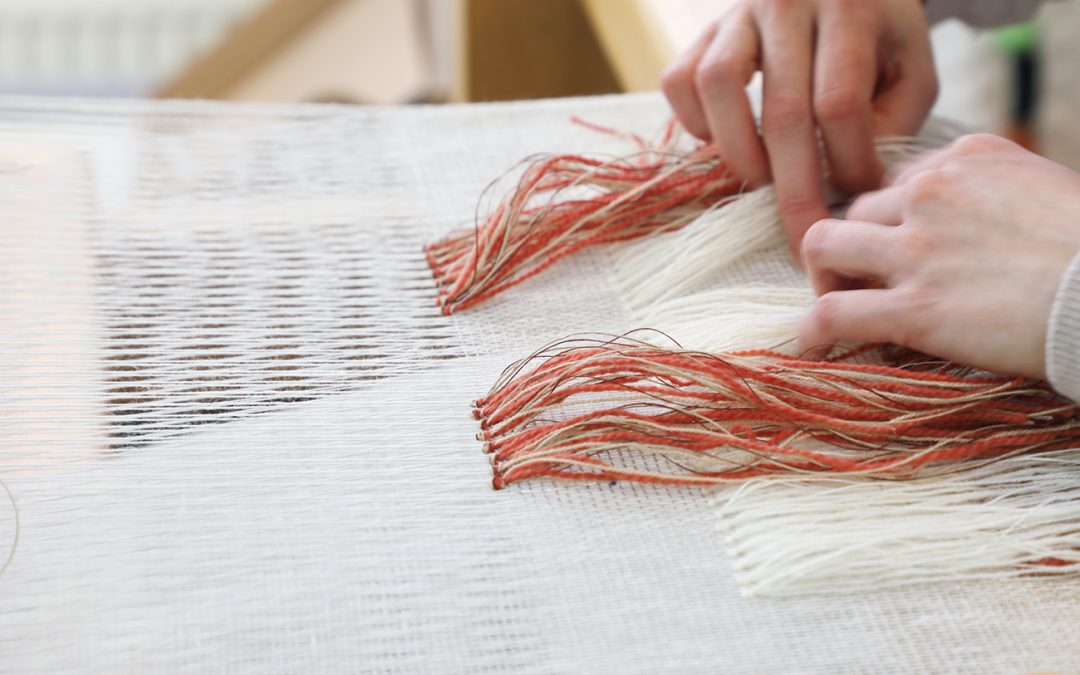
Make a fringe with a rya knot around two adjacent warp ends. Leave two warp ends between the fringes.
Cut threads to the length of 40 cm for the fringes. The length of the knotted fringe is approx. 19 cm. Weave the background with the same yarn as in the warp.
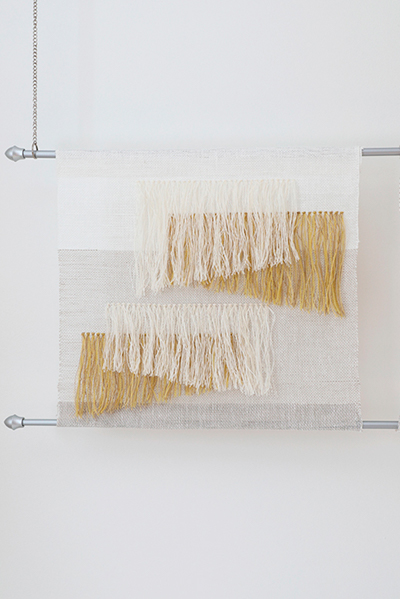
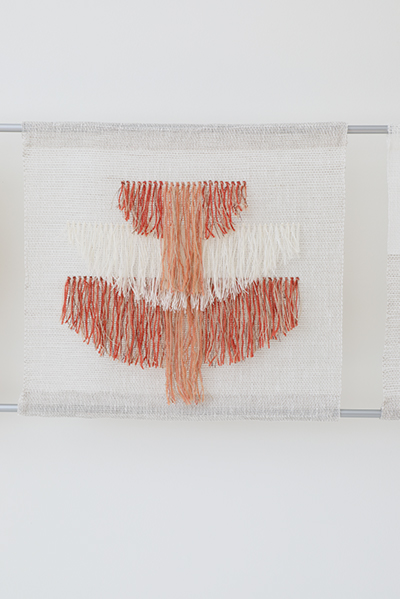
The lower part of the weave is unbleached and the upper is white in the yellow and the green work, but the red one is woven only with the unbleached background weft.
The density of the background weft is 5 threads/cm, it is same as in the warp.
Finishing
Sew the ends with 3-step zigzag stitches. Press the cloth. Measure the right place for the borders, fold and iron. Sew the borders by hand using white linen thread. Alternate with one short stitch (pick up one warp thread) to the cloth and one long stitch to the edge of the border. Leave the border ends open.
Cut the fringes according to the instructions below. Hang the weaves with one long rod in the same level or on different heigths. Add a rod also in the bottom border.
Amount of weft yarn needed
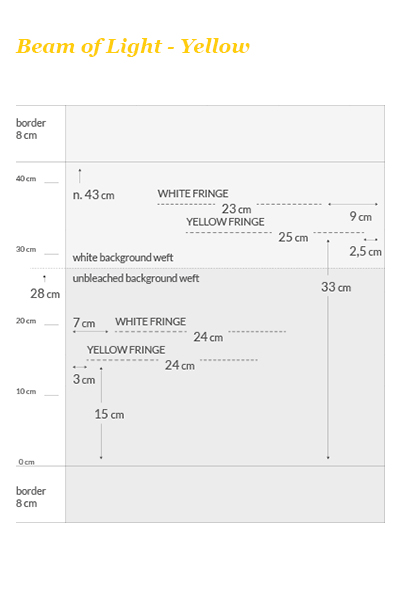
BEAM OF LIGHT – YELLOW
Background weft
Tow Linen or Line linen 8/1, Nel 8, tex 206,
1 kg = approx. 5 120 m
unbleached 23 g
half bleached 13 g
Yellow fringes
Line linen 16/1, yellow 5 g
Tow Linen 6/1, gold 9 g
Thin wool yarn, yellow 7 g
Silkwool yarn, greenish brown 4 g = 25 g in total
White fringes
Line linen 12/1, half bleached 3 g
Line linen 8/1, ¼-bleached 5 g
Thin 1-ply wool yarn, natural white 5 g
Silkwool yarn, white 3 g = 16 g in total
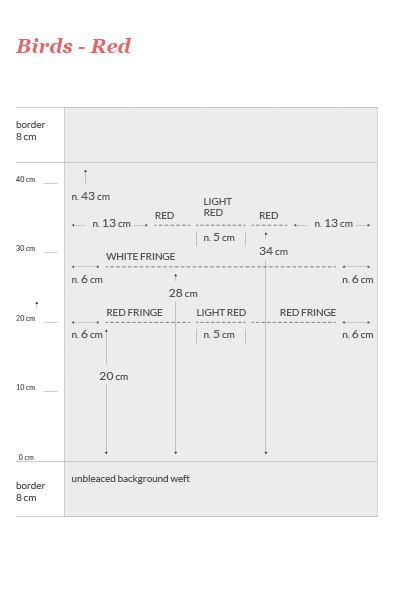
THE BIRD – RED
Background weft
Tow Linen or Line linen 8/1, Nel 8, unbleached 35 g
Red fringes
Line linen 16/1 dark reddish brown, Tow linen 6/1 gold, Wool yarn red, Silkwool yarn light beige
Approx. 20 g in total
Light red fringes in the middle
Tow Linen 6/1 gold, Cottolin 22/2 pale red, Wool yarn pale red, Silkwool light beige
Approx. 5 g in total
White fringes
Line linen 12/1 half bleached, Line linen 8/1 ¼-bleached, Wool yarn white, Silkwool yarn natural white
Approx. 5 g in total
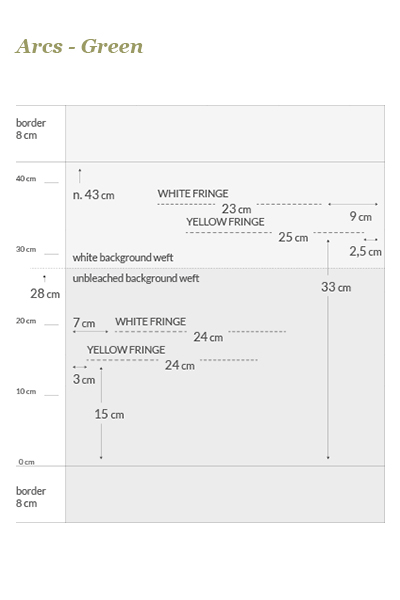
ARCS – GREEN
Background weft
Tow linen or Line linen 8/1 unbleached 19 g and half bleached 17 g
Green fringes
Tow linen 6/1 unbleached, Linen 16/2 bright green, Wool yarn forest green, Silkwool yarn beige
Approx. 10 g in total
White fringes
Linen 12/1, ½-bleached, Linen 8/1 ¼-bleached, thin 1-ply Wool yarn natural white, Silkwool yarn white
Approx. 10 g in total
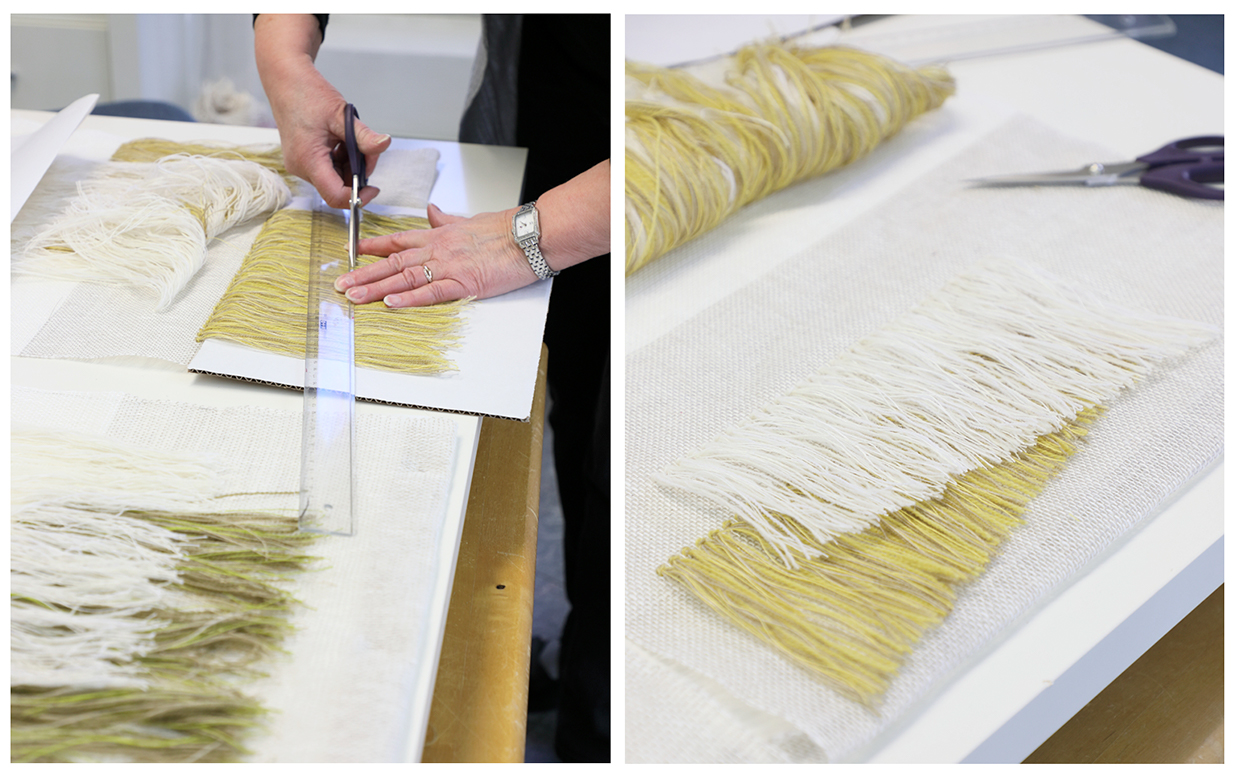
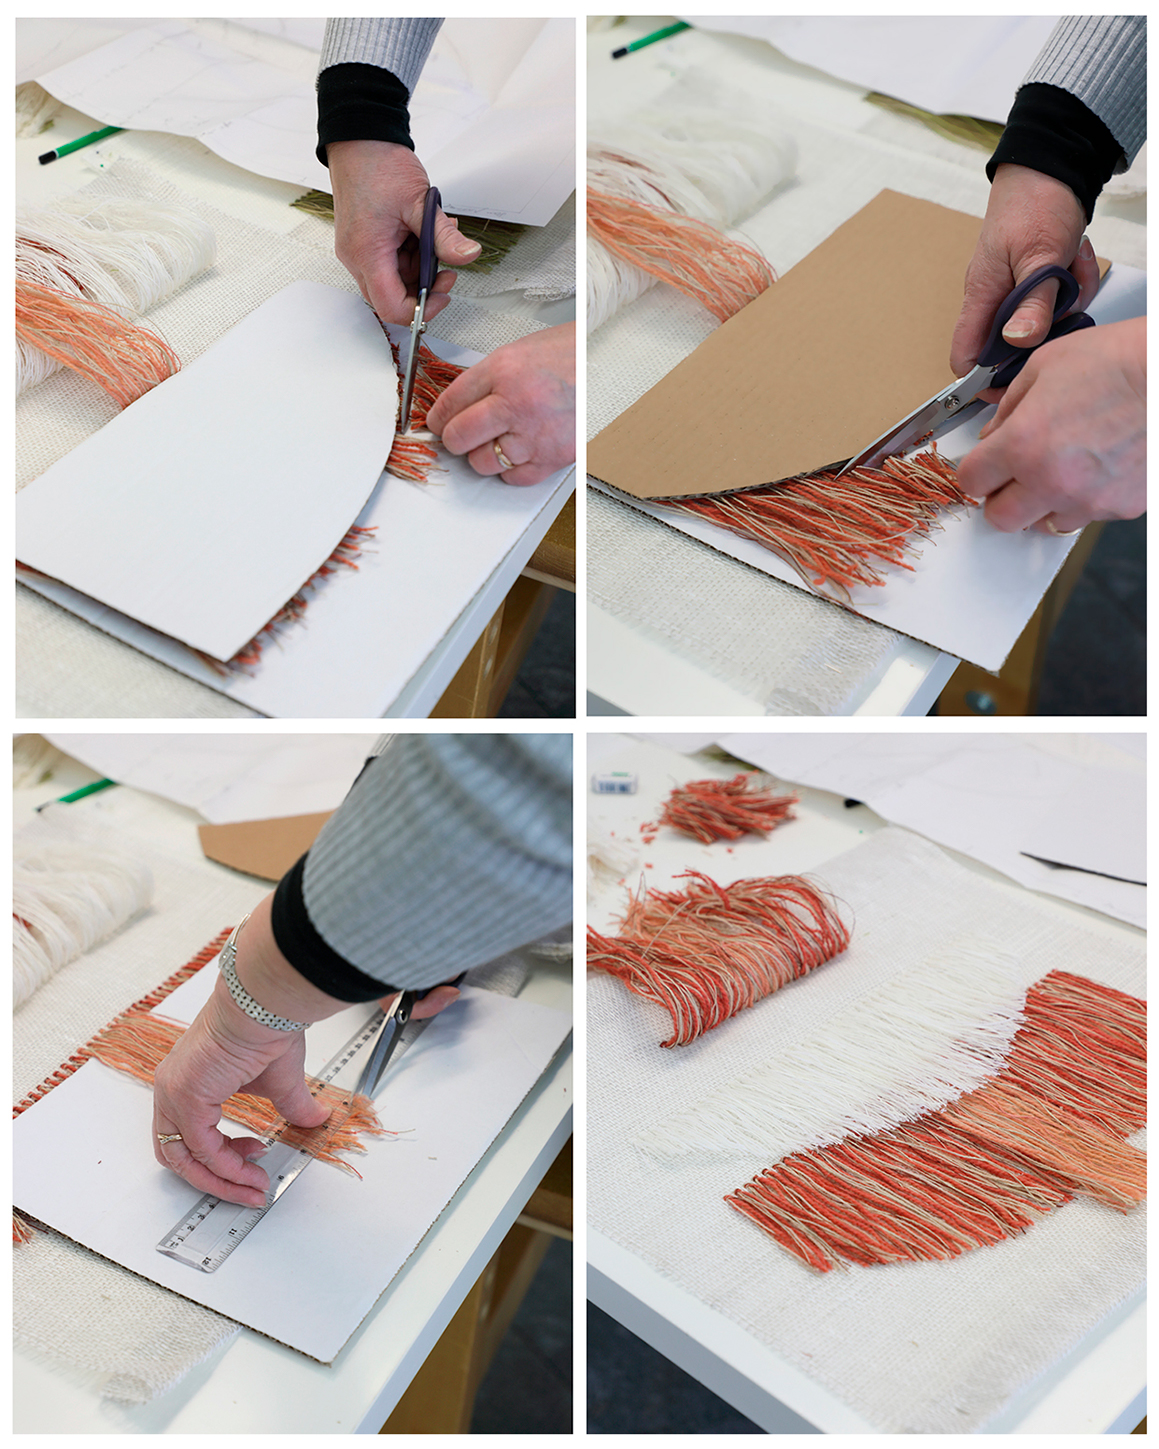
Cutting the fringes
Place a cardboard under the fringe for cover. Straighten the threads with fingers or a comb. Cut a second cardboard into a shape you want to the fringe.
Place the cardboard on the fringe and cut along the edge. Press while cutting to keep threads in order. Use sharp scissors!
Remove cardboards, straighten the fringes and trim the edge.
Straight lines are easy to cut with a ruler.